Updated 9-19-09
My cheap Chinese laser experience.
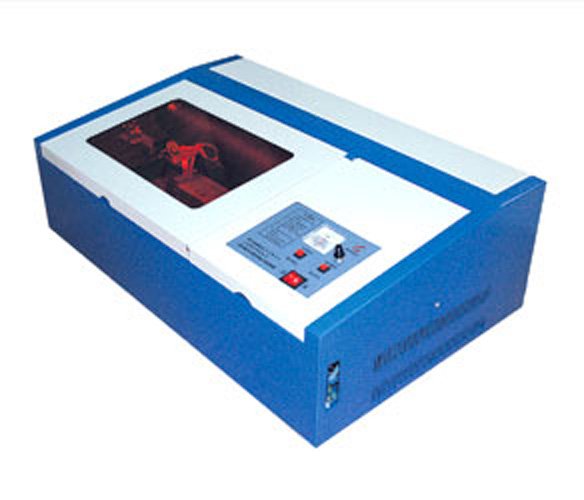
Being a tech type... and without a lot of money to spend... I purchased one of those amazingly low priced laser engravers coming out of China lately.
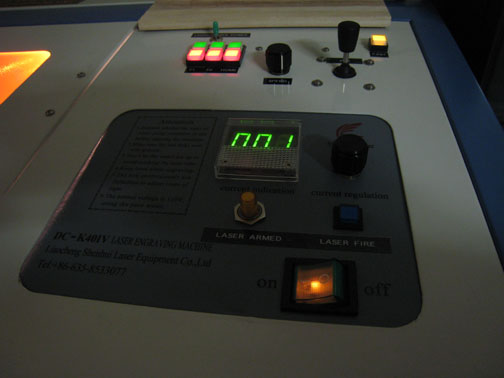
A 40 watt co2 model DC-K401V from Shenhui Laser Company.
To get anything from the USA would have cost several times it's purchase price.
I knew it would need some work here and there, but had no idea what was in store for me.
I set myself up for thinking it would arrive with a broken laser tube.
I knew I shouldn't get too excited and it would be more like an adventure than a plug-n-play tool.
In retrospect, it was exactly that: an adventure.
But one that had different twists and turns than I had expected.
The carton arrived unscathed.
In fact, decent box-within-a-box packing was provided.
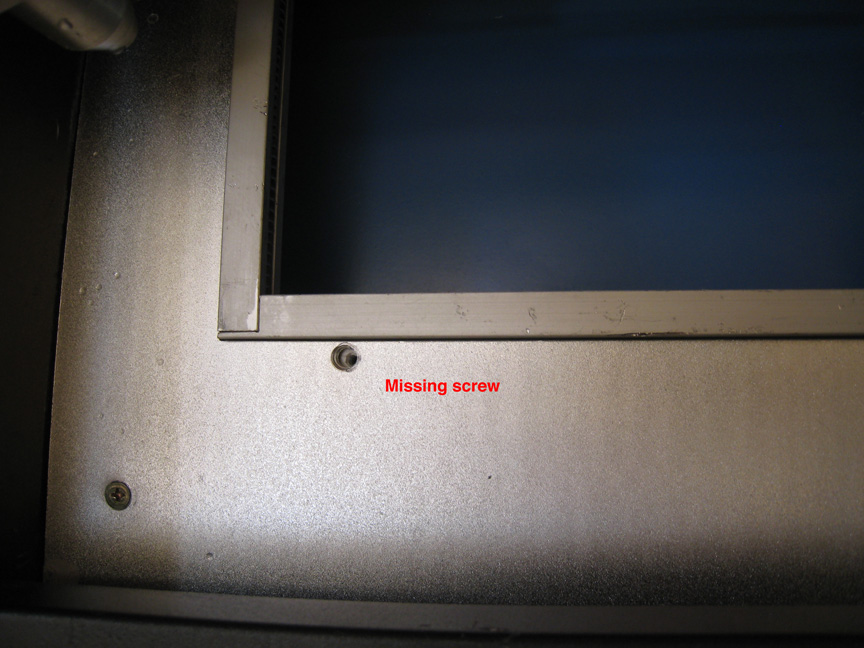
Inside however, the entire machine had almost completely shaken loose.
Screws missing, others extremely loose, parts wandering around inside.
It seems the Chinese haven't yet discovered lock washers.
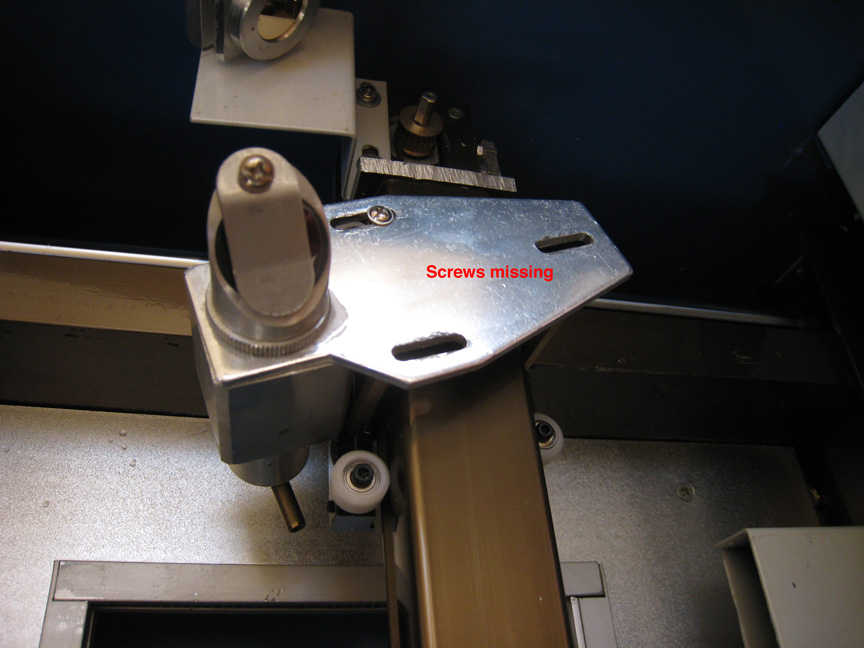
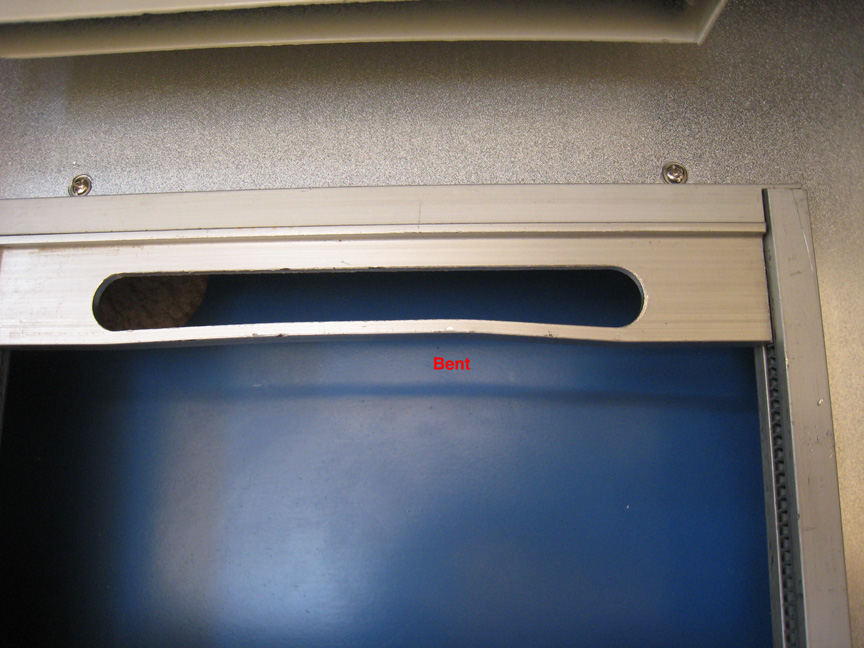
The X axis arm was bent and the laser focusing head was dangling on with one screw, where it normally would have 3.
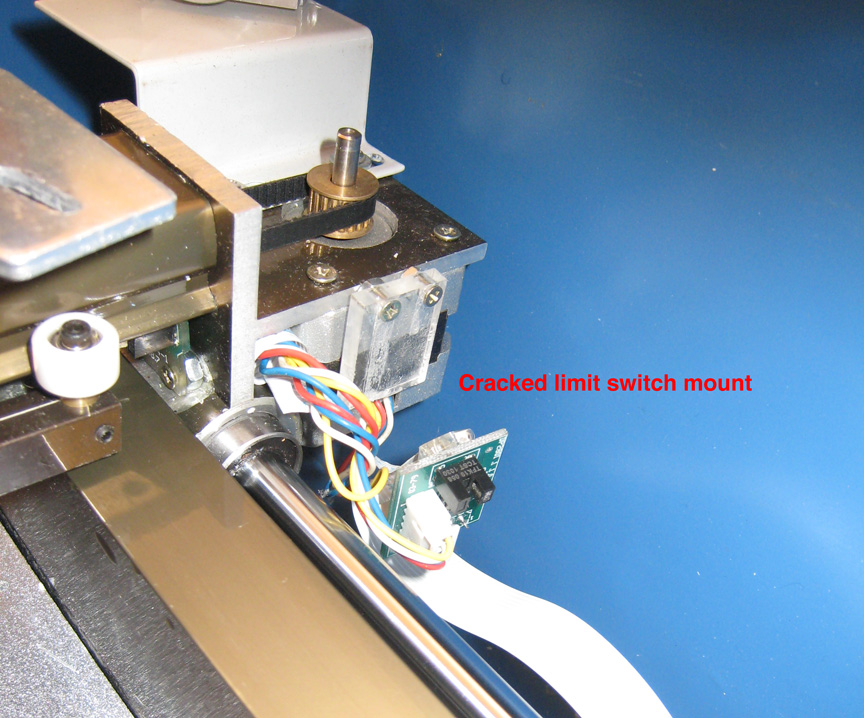
The electronics were also a mess.
Bare exposed wire and the optical limit sensor had broken its mount in two.
The HV supply, like the laser head, holding on with just one screw where it should have 4.
The AC inlet was cracked. The ground terminal missing.
Wires on the ballast resistor completely loose.
On and on...
But.... the laser tube was fine.
Below are the photos I sent to the seller.
He refunded a partial amount that was enough to make it worthwhile to try and fix it.


The water pump was a cheap Chinese (go figure) aquarium pump.
It was missing a piece that was shown on its package and then proceeded to fall apart in my hands.
Later, and only by searching the web, did I find that the unit was completely immersible, which solved some problems getting it flying after it was repaired.
It's not a self-priming pump.
I ended up dropping it completely in large Sparkletts bottle and mixing in 50/50 distilled water and anti-freeze.
The lenses and mirrors I had to clean and realign using a visible laser pointer.
I wish it had it's own beamsplitter and a "locater" visible laser, but it was a cheap unit and I knew (sort of) what I was getting.
After several days of work on and off, the machine was ready to test.
Low and behold, it worked.
Or at least the laser worked and burned things placed under it.
The limit sensor had to be adjusted, but that too was working soon afterwards.
A few days later, I found an intermittent connection on the ballast resistor.
This is a huge 51K 10% resistor. Probably about 50-100 watts.
I replaced it with a better one, though could only find ones that were 50K.
No huge problem, but I didn't expect to replace a simple resistor.
I mounted the new one much better also.
Old one: plumbers tape and a piece of sheet rubber as an insulator. One screw.
New one: dual teflon coated holders held to the chassis with stainless screws and lockwashers.
Better insulated connectors were also installed.
The unit came with a dongle for its "MoshiSoft" software.
Upon some investigation, the dongle was a highly encrypted goody and I wouldn't be able to get around it.
If you're asking yourself why on Earth require a dongle, it's pretty simple when you consider that these makers aren't so much concerned with others taking their software, as much as their software probably has bits of copyrighted code to begin with.
It's a lot easier to steal someone's rom based routines in a plotter or CNC machine than it is to write your own.
Also, the CPU chip had its number completely sanded off.
So the hardware and software shake hands and go to the dongle for verification.
Fairly clever, but really kills your market of potential users.
You MUST use their software to send data to the engraver.
Even if you do the drawings in Photoshop or Autocad, they have to be imported into Moshisoft.
And then... ouch... they're rendered in raster drawn format only.
Even if it's HPGL, which ruins the potential of the unit as a cutter.

Now here's where things get interesting.
I'm an Apple guy. I've had Apples since 1979, beginning with an Apple ][+.
I can find my way around a PC, but it's not my favorite place to be.
My current Apple is a 24" Intel Imac.
The Moshisoft package expects a PC using LPT1 on it's parallel port, Windows 2000 or XP, a USB buss, etc.
Pretty standard if you're a PC user.
But not for a Mac guy.
So I thought to myself....
A Mac has USB.
I have a USB to parallel converter.
I have Leopard, which features Bootcamp for running Windows.
If I install Windows, maybe I can run this thing.
I was able to get XP installed (no small ordeal, btw) and proceeded to test things.
No go. At least using the USB to parallel converter I was using.
It used the Prolific Technology PL2305 chipset.
I also ordered a different one advertised as using the ITE 8875 chipset, but when it was delivered, it also contained the PT PL2305.
I've yet to see if a Mac can drive the thing.
Regardless, at this point I took a huge left turn and decided to eliminate the Moshi electronics altogether.

I bought a Roland DXY-880 flatbed plotter off Ebay.
As a previous tech for Roland DG when these units first came out, I knew them very well.
I stlll had an original DXY-880/980 service manual and many parts.
My thought in all this was that I could replace the Moshisoft board with a Roland plotter board.
Many were selling for cheap, but I noticed that one particular buyer was buying them all.
They outbid me on several units, including a DXY980, which I really wanted instead.
(The DXY-980 features multi digit numerical readouts for X and Y position.)
So with this other buyer, if I wanted one now, I'd have to pay for it.
This other buyer got their other wins at between $40-$100, but they appeared to be ready to pay more since they were outbidding me.
Therefore, I would need to pay much more than they were generally going for.
I finally bid a very high price and got a DXY-880.
Funny enough, a previous bid of mine on a 980 received a second chance offer later and I ended up with both plotters.
Amazingly one plotter had roms in it with my handwriting.
I was the guy at Roland DG (US) who copied roms during those years.
After the requisite investigation into motor resistances, pinouts and voltages needed, I decided to try the idea.
That being, "Let's drive the engraver with plotter electronics and see how that goes."
I took the controller board to the 880 and modded it in several ways:
1. I added two small CPU fans in front of the hybrid BX-6101 motor driver.
This is a custom Rohm device made just for Roland.
Getting another would be almost impossible.
It's a hermetically sealed device and no specs are available.
While it was a complete guess as to whether it could drive the laser's motors, I didn't have much choice and so decided to keep it cool.
2. I jumpered across the line filter for the 28v line that powers the motors.
The power supply in the laser was clean enough, but only supplied 24 volts.
I needed as much juice as possible and the filter was an extra 1/3rd of an ohm.
I added a cap to aid in stiffening this voltage.
I also installed a fast blow 2 amp instead of their slo-blo 1.6 amp.
3. I located a logic level point that changed for pen up and down.
While it would seem the most logical place to grab that signal would be the plotter's pen solenoid, the Roland uses chopped signals to relieve current draw (and melted solenoids ;-).
I just wanted a hi/lo logic level and found one.
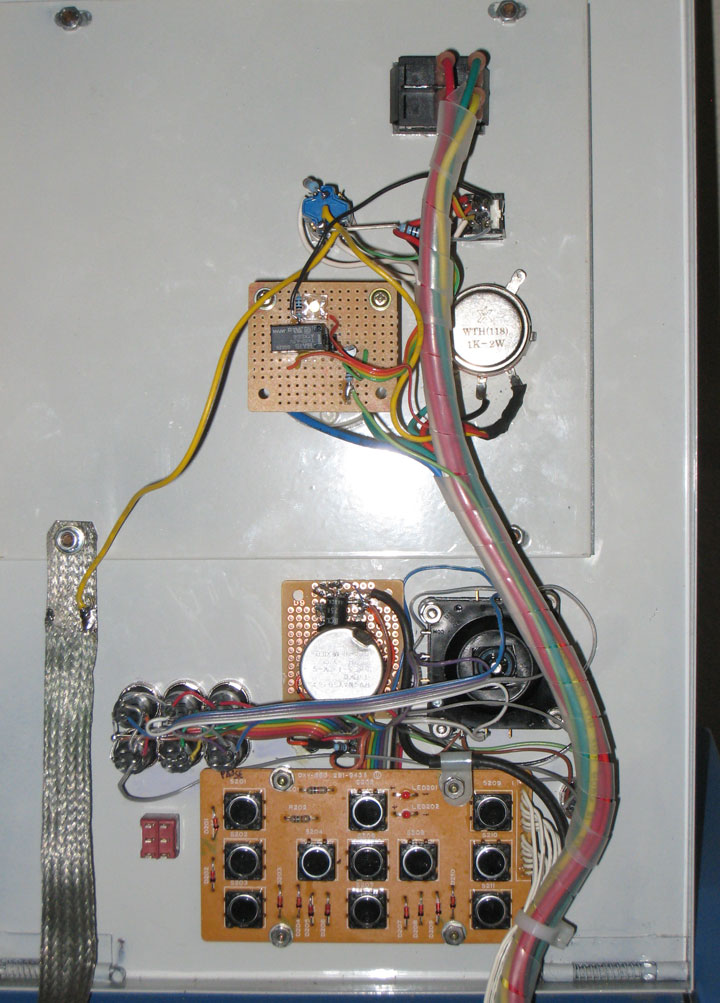
(Please note: the relay below has since been replaced by a Vactrol.
Slightly slower, but silent and no difference to engrave quality.)
4. I made a small board with an Aromat relay that switched from this pen up/pen down logic level.
One transistor to drive it and a diode to snub reverse currents and 10K of input resistance and I was in business.
This relay would short across the button provided to turn on the laser.
I had no idea what voltages or signals the engraver had across this button, so decided a relay was the safest choice.
These relays can switch extremely fast (3-5K a sec max!), so no problems there.
An LED was added as well just so I could be forewarned that the laser was enabled when the panel was up.
So... how did it work?
Unbelieveably well.
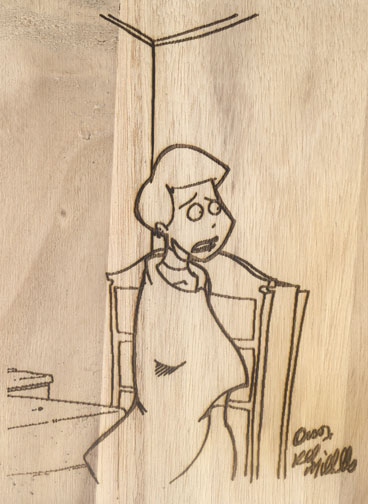
I was able to send HPGL from my Apple //e directly to the laser and easily engraved text with a simple basic program.
I also adapted an Apple II program I wrote decades ago to convert screen images to plotter language.
Basically a crude raster to vector converter.


Click HERE for a close-up of above.
Click HERE for a video of it drawing it.
(If you look closely, you'll see it "cropping" the drawing automatically.
This is good.
But if you look at the schemo, you can see some alignment problems.
This isn't so good, but I'm working on it.)
As I messed with the unit more, I noted what changes would need to be made.
Plotters like to zip pens around fairly quickly and the faster a laser engraves, the less it burns.
Somehow I needed to slow down the motors if I was going to attempt cutting anything and not just do engraving.
I reviewed the schematics for the DXY-980, which are the same basic schemos for the DXY-880.
It was a simple Z80A CPU running on a 4 mhz clock.
While there were other programmable counters in the unit, they were all synched to this one clock.
Since I was running the unit via a parallel interface, which handshakes, I didn't care about baud rates.
I wasn't planning on using the serial ports anyways.
I swapped the 4mhz ceramic resonator with a 2mhz crystal.
Low and behold, it was 50% slower. Success!
However it still wasn't slow enough.
I decided that I needed to go slower still.
I knew I was in danger of burning up the drivers or the motors, but felt a need to make the machine do what I needed or it was otherwise useless.
I found a small surface mount chip called an LTC1799.
It's basically a programmable clock oscillator.
I wired up a pot and resistor so that the output frequency would be continuously variable from 1 mhz (1/4 speed) to 4 mhz (full speed.)
To make a long story short, this mod worked great.
However the actual pulse widths being fed to the motors were arrived at by resistor constants in the DXY-880 drive electronics.
Going too slow would overlap these pulse widths and make the motors both miss steps and draw lots of current.
I've yet to devise a way to dynamically control these pulses, but haven't yet looked into it much either.
Still, I can go at least 50% slower than normal.
It should be noted that the Roland plotters allow slower movement by turning them on while holding down a button.
This isn't so useful in the grand scheme of things, but nice to have.
While the Roland plotters come with a keypad to control X/Y movements, speed and various other functions, they're ackward to use and I had no good way of mounting their panel.
I choose to install a joystick and buttons instead.

I also mounted the original control board inside the unit so it could still be controlled when the panel is in the raised position.
While the Roland allows pressing an up or down button along with a right or left button (for diagonal movements), it's hard to press two along with the often accompanying "Fast" button.
The joystick allowed angular movement that actuated two switches in any diagonal direction, so I now had an 8 axis controller instead of 4 silly membrane buttons.
The added "Fast" button next to joystick can still be operated with the same hand controlling the joystick too.

Other changes made.
Sometimes the engraver would miss motor steps as illustrated above in the Boss schematic drawing.
I figured this was due to not enough torque and thus not enough current or voltage available.
Upon some poking around, I found that the power supply for the engraver put out a perfect 24 volts, but had an adjustment trimmer inside.
After some tests and said trimmer being tweaked, I now had 27 volts available.
This was much closer to the Roland's desired 28 volts, and afterwards had fewer problems with motor movements.
I plan on upping this voltage to 28 or above later.
A switch was also installed on the panel to turn on and off the Roland main electronics.
It's not hooked up yet in the photos, but allows powering down the interface when needed.
Moving the laser arm manually or clearing a data transmission error are two examples.
I also made a mount for a small CCD color camera that attached to the laser nozzle.
It allows closeup monitoring of burn depth if I want.
Since the camera moves with the laser, it appears that the wood underneath is moving instead.
Set to wide angle, here's a video of it engraving.

Some later updates and changes:
The two power supplies (+5/+28) have been replaced with better results.
The mA meter (laser power) has been replaced with a digital type.
The pot for adjusting the laser power has been replaced and a trimmer added to make it easier to adjust accurately over its entire range.
Added heavier duty power cord and TrippLite Isobar power conditioner.
The coolant pump has been replaced with a higher pressure type and a flow indicator.
I removed the clamp assembly in the engraving area and replaced it with a flat piece of perforated steel.
I've added an air line to the laser nozzle using Tygoprene tubing and an air pump.
I've added a safety switch so the laser shuts off if the door is opened.
Software
Using Chipmunk BASIC for OSX, I wrote a program that takes a high resolution photo and converts it to HPGL for the engraver.
(bitmap to vector converter.)

It features contrast threshold control, lossless scaling and tight output code.
Resolution is .001" (.0254 mm) max.
I can take a 1024 x 800 dpi screen image and engrave it as small as 1.024" x .800" or as large as the physical limits of the engraver with no loss of resolution.
By incorporating HPGL's "velocity" command, the laser now speeds up over unengraved areas and slows down during actual engraving.
This results in better quality engraving and faster overall jobs.
Unfortunately, I still can't control my USB to Parallel converter from the Mac side.
I have to reboot into BootCamp/XP and print it using NotePad in Windows.
A real drag.
Here are some pics after this software was working.
Some pics were preprocessed using HyperDither, which uses Bill Atkinson's algorithm and is arguably nicer than other dithering algorithms.


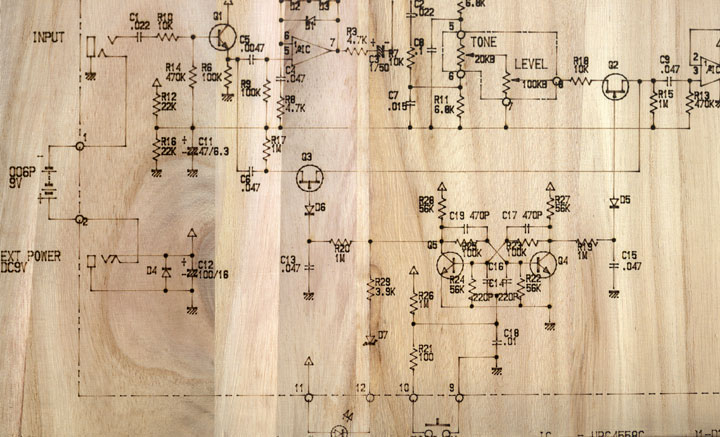
The above was a test for burning off vinyl to make PCB's.
This idea worked and I can make simple PCB's with this method.

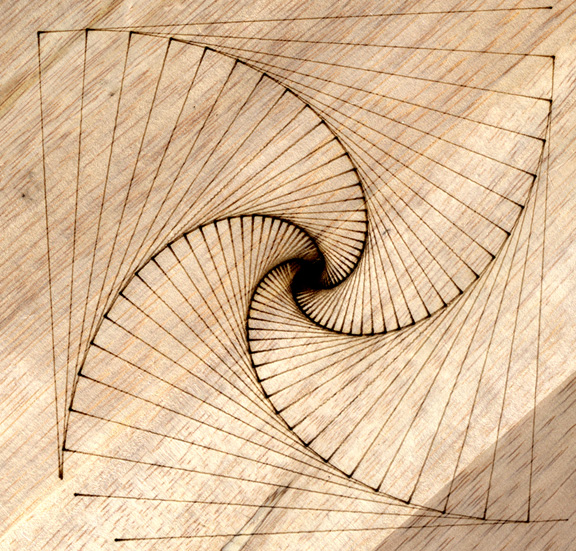
Actual neon cat
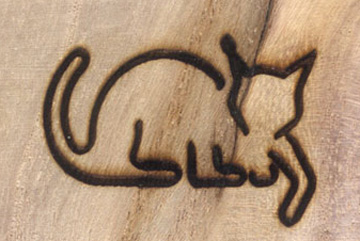
Raster engraved
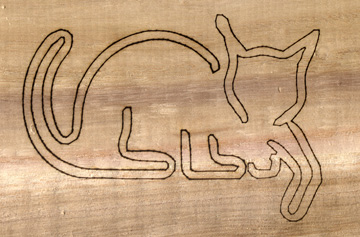
Vector engraved (low res)


Latest update (9-19-09):
I have since been able to use a USB to Serial converter to directly control the laser from the Mac.
I am using an old terminal program called Z-Term.
Simply paste in the HPGL and the laser starts engraving.
Unfortunately, my mod to control the clock rate of the DXY plotter board cannot be used.
It would lower the baud rate for serial reception and create data errors.
So all engraving must run at the maximum hardware speed.
It can only be slowed down via the (limited) software velocity commands.
This renders the machine almost useless for cutting applications when using the Mac.
In order to cut now, I have to use an Apple II, which has a parallel interface.
I've deleted Microsoft XP entirely.
Now considering a small PC laptop, but don't have the money to buy one.
Maybe one day....
Oh and these are some of the latest things I've done with it....


You might also find this amusing....